

Walk-In Freezer Solutions That Keep Your Cold Storage Running Efficiently
2026-11-17
Every degree your walk-in freezer drifts costs more than energy—it shortens shelf life and turns routine storage into a guessing game. Reliable walk-in freezer solutions should keep cold storage running efficiently without constant babysitting. That’s the standard behind ART’s approach: practical, built-to-work systems that hold temperature, cut waste, and keep your operation moving. Here’s what to look for.
Right-Sizing the Box So Cold Air Moves Freely
A box that barely fits forces cold air to squeeze through narrow gaps, and that pressure shows up as warm pockets near the lid or along the back wall. Trimming the container dimensions even slightly gives the chilled air a chance to circulate instead of bouncing off a packed surface.
Leaving clearance around the sides and top of the box matters most near the fan outlet and return vents. When those openings stay unobstructed, the air can travel across the contents, pick up heat, and carry it back to the coil without short-cycling or stalling.
The payoff is less about tidy storage and more about stable holding temperatures. Food keeps longer, frost builds up more slowly, and the cooling unit doesn't have to work as hard to hold a set point.
Holding Temperature Steady Through Rush Hours
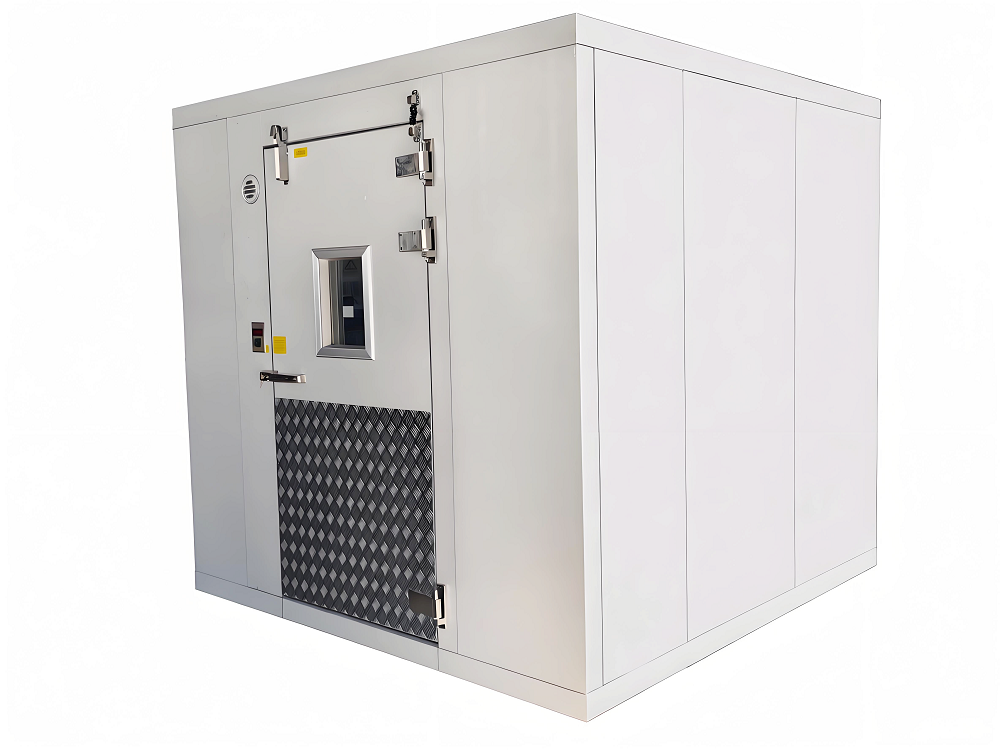
Most temperature swings during peak periods come from reacting too late. Doors open more often, bodies move through the space, and equipment cycles overlap, so the system ends up chasing a reading instead of getting ahead of it. A steadier approach is to start the rush a degree or two lower or higher before the load hits, then let the thermal mass and airflow carry the room through the busiest stretch without constant setpoint changes.
Air distribution usually matters more than raw cooling or heating power at that point. If one zone near the entrance gets blasted while the back corners stagnate, people start adjusting thermostats and the whole system fights itself. Balancing dampers, keeping vents clear, and using partitions or curtains to keep conditioned air where it is actually needed can hold a much more even temperature than another round of thermostat corrections.
Short-interval monitoring helps, but it should be used for early warnings rather than constant manual overrides. Give the controls a narrow but realistic deadband and let small spikes settle on their own. Chasing every degree swing during a crowded hour often makes the oscillation worse. Once the rush passes, ramp back gradually instead of snapping to the normal schedule, otherwise the sudden change creates another uncomfortable dip.
Defrost Settings That Match Real Kitchen Rhythms
A real kitchen rarely follows the neat instructions on frozen packaging. Some nights you remember to pull chicken out the night before; plenty of others you are staring at a solid block at 5:45 with no plan. Defrost settings should feel less like a lab timer and more like a flexible kitchen hand, offering weight-based and quick modes that meet you where you actually are, not where a recipe assumes you should be.
The better programs also understand that defrosting is not the same as cooking on low. They shift power in stages, pausing long enough for the edges to share their cold with the center instead of going gray and rubbery. That short rest in the middle, or a flip reminder timed after a minute or two, is what keeps a pork chop from turning into a hot fringe around an icy middle.
Then there is the interrupted rhythm of a home kitchen: a phone rings, a child needs something, a pan is not ready. A useful defrost setting lets you pause and resume without restarting the whole countdown, and gives a gentle end signal instead of a persistent alarm. The goal is not to force you into a strict schedule; it is to make the appliance fit the stop-and-start way most people actually cook.
Door and Gasket Fixes That Stop Small Leaks Early
A door that does not close squarely can leave just enough of a gap for moisture or air to slip through long before the problem becomes obvious. Checking the hinge tension and the strike plate alignment takes only a few minutes, and tightening loose screws often restores the seal. If the door has shifted over time, adjusting the hinge position or adding a thin shim behind a hinge leaf can bring the edges back into even contact.
Gaskets harden and flatten with age, especially along the bottom edge where weight and heat accumulate. Run a fingertip along the sealing surface to feel for flat spots or cracks; a dollar bill closed in the door should drag slightly when pulled out. Cleaning the gasket with warm water and a mild soap removes sugar and grease that prevent full contact, while applying a thin coat of silicone lubricant can keep the rubber supple between replacements.
When small leaks persist, replace the gasket before the problem spreads. Warm the new gasket in hot water for a few minutes so it flexes easily into the channel, then seat it from the corners inward to avoid puckering. A snug, even fit around all four edges stops the slow leakage that often goes unnoticed until it has already caused warping, rust, or higher energy use.
Remote Temperature Alerts Before a Small Drift Becomes Spoilage
A small upward drift in temperature rarely looks like an emergency at first. A sensor reads 0.8°C above the target, a compressor cycles a little longer than usual, or a door seal lets in a trace of warm air. On their own these shifts seem harmless, but over several hours they can quietly push perishable goods into the danger zone where microbial growth accelerates. Remote alerts turn those quiet signals into an early notice, so someone can act while the problem is still easy to correct.
Rather than waiting for a fixed threshold to be crossed, the alert system watches how temperature moves away from the baseline. At 2 a.m., a cold storage unit may show a slow rise in return air temperature that never triggers a hard limit. The system picks up that drift and sends a notification with the location, the size of the shift, and how long it has been running. A staff member can then adjust a set point, check a door, or call for service before the next scheduled walkthrough.
That kind of early intervention is what keeps a minor drift from becoming spoilage. Each alert acts as a small cue to address stress on the product before enzyme activity, bacterial growth, and texture changes have a chance to take hold. For temperature-sensitive loads, the value is not in knowing something went wrong hours later, but in catching the beginning of the problem while the shipment can still be saved.
A Realistic Cleaning and Coil Care Schedule for Busy Teams
Most teams don’t need another deep-cleaning project; they need a rhythm that fits around shift changes and production days. The easiest approach is to attach coil care to an existing weekly or monthly equipment walkthrough. Pick one person per shift to spend ten minutes checking filters, wiping down accessible coil surfaces, and clearing debris from the drain pan area. Rotate the responsibility so it doesn’t become one technician’s invisible side job. A simple laminated card with clear photos showing acceptable and problem conditions cuts down on guesswork more than any lengthy manual.
For deeper maintenance, block out thirty minutes at the start of each cooling or heating season. That’s when you can safely shut down the unit, remove larger debris, apply a non-acidic coil cleaner, and rinse low-pressure areas without rushing. If time is tight, split the work by zones over two weekends instead of trying to do everything in one afternoon. The goal isn’t a spotless coil; it’s avoiding the kind of surprise failure that eats an entire day later. Busy teams usually find that small, recurring steps do more for reliability than occasional all-hands deep cleans.
FAQ
Usually it comes down to worn door gaskets, blocked evaporator coils, or repeated door openings during busy shifts. Ice buildup on the evaporator can also trick the thermostat into short cycling, which makes the temperature drift faster than most operators expect. Checking the defrost schedule and door seals first tends to solve the bulk of the issues before calling for service.
A practical approach is to reduce warm air infiltration rather than raising the setpoint. That means checking door closers, adding strip curtains or high-speed doors for busy entryways, and keeping evaporator coils clean. Also, scheduling defrost cycles to run only when ice actually accumulates rather than on a fixed timer can cut consumption noticeably while keeping temperatures stable.
Cleaning the condenser and evaporator coils, plus testing door gaskets, offer the quickest wins. Dirty coils force the compressor to run longer and hotter, which raises energy bills and wears out components. Replacing a worn gasket or adjusting a door closer is inexpensive but can eliminate a large share of frost and moisture problems inside the box.
It depends on the integrity of the panel insulation and the condition of the refrigeration system. If the panels are waterlogged or separating, replacing them often makes more sense than chasing frost and condensation issues. If the box structure is solid, upgrading the evaporator, controller, or door hardware can extend the unit's life for years at a fraction of replacement cost.
Frost near the door usually points to air leaks or missing air curtains. Warm, humid air enters and the moisture freezes on the coldest surfaces. Fixing door alignment, installing strip curtains, and making sure the door heater is working can reduce most of it. For floor ice, check that the drain line is clear and the defrost water is actually leaving the box rather than pooling and refreezing.
Constant running often means the evaporator is not absorbing enough heat or the refrigerant charge is off. A frosted evaporator, a failing expansion valve, or an oversized or undersized system can all cause the compressor to run longer than it should. A quick check of the sight glass, superheat, and coil condition usually reveals whether it is an airflow problem or a refrigeration circuit issue.
Look for continuous panel insulation without thermal breaks, door frames with effective heaters, and a refrigeration system sized for your actual product load and door traffic. Choosing an electronic controller with demand-based defrost and temperature logging will give you better control than a basic thermostat. Also, plan enough clearance around the evaporator coil so airflow is not choked from day one.
Conclusion
A walk-in freezer runs efficiently only when the space is sized to the actual load and the air inside can move without fighting tight shelving or overstuffed inventory. Leaving a few inches between product and walls, avoiding floor-stacked boxes that block return air, and checking that evaporator fans are unobstructed often matter more than lowering the setpoint. During rush hours, the box faces repeated door openings and warm air surges, so probes and thermostats should be positioned away from doorways and calibrated against a handheld thermometer rather than trusted blindly. Defrost cycles also deserve attention: a kitchen that does most of its receiving in the morning may need a defrost window before prep starts, not during the lunch push. Matching those cycles to real kitchen rhythms keeps coils clear without forcing the compressor to recover during the busiest stretch.
Small leaks around doors and gaskets are easy to ignore until frost builds up and the system runs longer than it should. Checking gasket contact with a dollar bill pull test, adjusting hinge tension, and replacing worn sweeps or bumpers can stop those losses before they become expensive. Remote temperature alerts add another layer of protection because they catch a slow drift while staff are off-site or focused on service, rather than after product has already warmed. Finally, coil care has to fit the way a busy team actually works. A short weekly vacuum or brush-down of accessible coil surfaces, a monthly check for ice patterns, and a quarterly deep clean are more realistic than asking cooks to follow a daily checklist they will skip. Taken together, these habits keep a walk-in freezer reliable without turning maintenance into a second job.
Contact Us
Contact Person: Ellen
Email: [email protected]
Tel/WhatsApp: +86-535-2229725
Website: https://www.artrefrigeration.com/